开发环境
| 名称 | 版本 |
|---|---|
| 操作系统 | Windows 10 X64 |
| JDK | JDK1.8(jdk-8u151-windows-x64) |
| IntelliJ IDEA | IntelliJ IDEA 2021.2.1 |
| Maven | Maven 3.6.0 |
| Thtift | Thtift 0.9.3 |
参考
Thrift 简介
Thrift 最初由 Facebook 开发的,后来提交给了 Apache 基金会将 Thrift 作为一个开源项目。
当时 Facebook 开发使用它是为了解决系统中各系统间大数据量的传输通信以及系统之间语言环境不同需要跨平台的特性。
所以 Thrift 是支持跨语言,比如 C++, Java, Python, PHP, Ruby, Erlang, Perl, Haskell, C#, Cocoa, JavaScript, Node.js, Smalltalk, OCaml 都支持。
Thrift 是一个典型的 CS 结构,客户端和服务端可以使用不同的语言开发。
既然客户端和服务端能使用不同的语言开发,那么一定就要有一种中间语言来关联客户端和服务端的语言,没错,这种语言就是 IDL(Interface Description Language)。
Thrift 通过一个中间语言 IDL(接口定义语言)来定义 RPC 的数据类型和接口。这些内容写在以
这些内容写在以 .thrift 结尾的文件中,然后通过特殊的编译器来生成不同语言的代码,以满足不同需要的开发者。
比如 Java 开发者,就可以生成 Java 代码,C++开发者可以生成 C++ 代码,生成的代码中不但包含目标语言的接口定义,方法,数据类型,还包含有 RPC 协议层和传输层的实现代码。
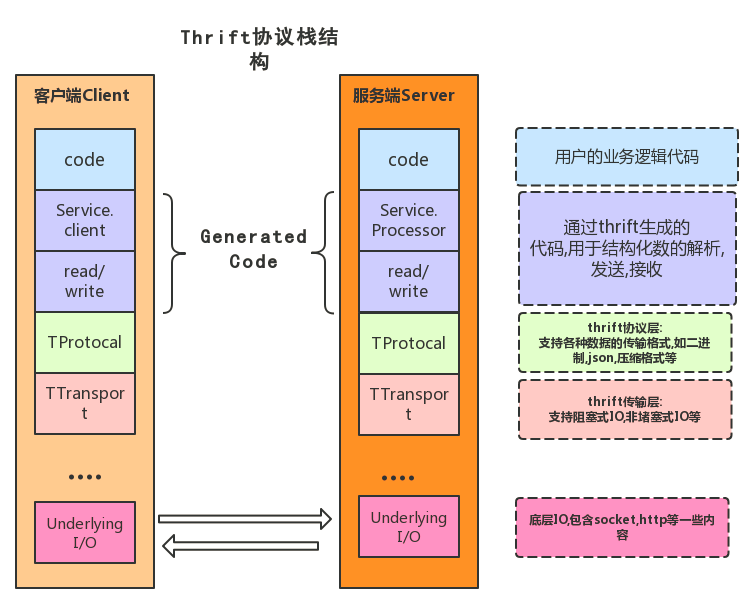
● 在最上层是用户自行实现的业务逻辑代码。
● 第二层是由 Thrift 编译器自动生成的代码,主要用于结构化数据的解析,发送和接收。
● TServer 主要任务是高效的接受客户端请求,并将请求转发给 Processor 处理。
● Processor 负责对客户端的请求做出响应,包括 RPC 请求转发,调用参数解析和用户逻辑调用,返回值写回等处理。
● 从 TProtocal 以下部分是 Thrift 的传输协议和底层I/O通信。
● TProtocal 是用于数据类型解析的,将结构化数据转化为字节流给 TTransport 进行传输。
● TTransport 是与底层数据传输密切相关的传输层,负责以字节流方式接收和发送消息体,不关注是什么数据类型。
● 底层 IO 负责实际的数据传输,包括 Socket、文件和压缩数据流等。
Thrift 服务开发流程
Thrift 服务开发流程,简单概述如下:
● 定义 IDL 文件(xxx.thrift文件)
● 用 xxx.thrift 文件生成 Java 代码(服务接口文件)
● 服务端实现(创建服务):实现服务接口,开启服务器
● 客户端实现(服务消费):引入接口,进行远程调用
Thrift 下载安装
下载地址
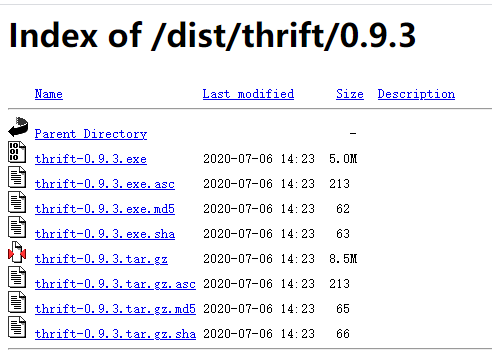
thrift-0.9.3.tar.gz 下载地址:http://archive.apache.org/dist/thrift/0.9.3/
thrift-0.9.3.exe 下载地址:http://archive.apache.org/dist/thrift/0.9.3/
这里我下载 thrift-0.9.3.exe
本地安装
1.拷贝 thrift-0.9.3.exe 到 D:\Program Files\Thtift 目录
2.配置环境变量,计算机-属性-高级系统设置-环境变量(N)...
创建和修改下面两个环境变量
| 环境变量名称 | 值 | 操作 |
|---|---|---|
| Thtift_Home | D:\Program Files\Thtift | 新增 |
| Path | 在最后添加变量值 ;%Thtift_Home% |
修改 |
接下来测试 thrift 的环境变量是否安装正确,Ctrl+R 输入 cmd 打开DOS窗口,在窗口输入 thrift-0.9.3 -version
输出 Thrift version 0.9.3,配置成功
C:\WINDOWS\system32>thrift-0.9.3 -versionThrift version 0.9.3
Thrift Java Demo 案例
Demo 代码
定义一个 IDL 接口描述文件-QueryService.thrift
D:\Program Files\Thtift\QueryService.thrift
namespace java com.demo.thrift.serviceservice QueryService{string query(1:string query)}
这里定义了一个 QueryService 服务,包含一个 query 方法,入参和返回值都是一个 string 类型的参数。
Thrift 生成代码-QueryService.java
控制台进入 D:\Program Files\Thtift,输入 thrift-0.9.3.exe -r -gen java QueryService.thrift

生成后的目录结构如下:

D:\PROGRAM FILES\THTIFT└─gen-java└─com└─demo└─thrift└─service└─QueryService.java
创建 Java 项目
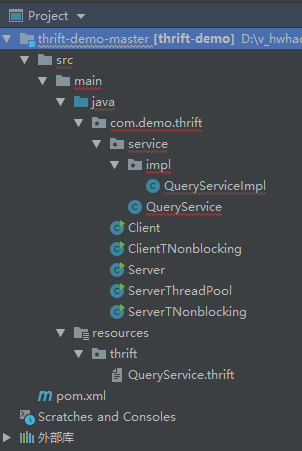
目录结构如下
拷贝 QueryService 到对应路径
pom.xml
<?xml version="1.0" encoding="UTF-8"?><project xmlns="http://maven.apache.org/POM/4.0.0" xmlns:xsi="http://www.w3.org/2001/XMLSchema-instance"xsi:schemaLocation="http://maven.apache.org/POM/4.0.0 http://maven.apache.org/xsd/maven-4.0.0.xsd"><modelVersion>4.0.0</modelVersion><groupId>com.demo.thrift</groupId><artifactId>thrift-demo</artifactId><version>1.0-SNAPSHOT</version><packaging>war</packaging><dependencies><dependency><groupId>junit</groupId><artifactId>junit</artifactId><version>4.12</version><scope>test</scope></dependency><dependency><groupId>org.apache.thrift</groupId><artifactId>libthrift</artifactId><version>0.8.0</version></dependency><dependency><groupId>org.slf4j</groupId><artifactId>slf4j-log4j12</artifactId><version>1.5.8</version></dependency></dependencies></project>
QueryService 实现类-QueryServiceImpl
package com.demo.thrift.service.impl;import com.demo.thrift.service.QueryService;import org.apache.thrift.TException;public class QueryServiceImpl implements QueryService.Iface {@Overridepublic String query(String query) throws TException {return "Hello," + query;}}
服务端和客户端-简单版
服务端-Server
创建服务器端实现代码,将 QueryServiceImpl 作为具体的处理器传递给 Thrift 服务器,代码如下:
package com.demo.thrift;import com.demo.thrift.service.QueryService;import com.demo.thrift.service.impl.QueryServiceImpl;import org.apache.thrift.TProcessor;import org.apache.thrift.protocol.TBinaryProtocol;import org.apache.thrift.server.TServer;import org.apache.thrift.server.TSimpleServer;import org.apache.thrift.transport.TServerSocket;public class Server {public static final int SERVER_PORT = 8888;public static void main(String[] args) {try {System.out.println("Thrify Server TSimple Start ....");TProcessor tprocessor = new QueryService.Processor<QueryService.Iface>(new QueryServiceImpl());// 简单的单线程服务模型,一般用于测试TServerSocket serverTransport = new TServerSocket(SERVER_PORT);TServer.Args tArgs = new TServer.Args(serverTransport);tArgs.processor(tprocessor);tArgs.protocolFactory(new TBinaryProtocol.Factory());// tArgs.protocolFactory(new TCompactProtocol.Factory());// tArgs.protocolFactory(new TJSONProtocol.Factory());TServer server = new TSimpleServer(tArgs);server.serve();} catch (Exception e) {System.out.println("Server Start Error!!!");e.printStackTrace();}}}
客户端-Client
package com.demo.thrift;import com.demo.thrift.service.QueryService;import org.apache.thrift.TException;import org.apache.thrift.protocol.TBinaryProtocol;import org.apache.thrift.protocol.TProtocol;import org.apache.thrift.transport.TSocket;import org.apache.thrift.transport.TTransport;import org.apache.thrift.transport.TTransportException;public class Client {public static final int SERVER_PORT = 8888;public static final String SERVER_IP = "localhost";public static final int TIMEOUT = 30000;public static void main(String[] args) {TTransport transport = null;try {transport = new TSocket(SERVER_IP, SERVER_PORT, TIMEOUT);// 协议要和服务端一致TProtocol protocol = new TBinaryProtocol(transport);// TProtocol protocol = new TCompactProtocol(transport);// TProtocol protocol = new TJSONProtocol(transport);QueryService.Client client = new QueryService.Client(protocol);transport.open();String result = client.query("Luoma");System.out.println("Thrify Client Result = " + result);} catch (TTransportException e) {e.printStackTrace();} catch (TException e) {e.printStackTrace();} finally {if (null != transport) {transport.close();}}}}
测试-简单的服务端和客户端
运行 Server 的 main 方法

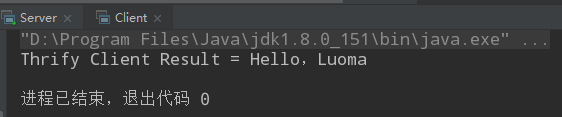
运行 Client 的 main 方法,可以看到,已经运行成功
服务端-线程池服务模型-ServerThreadPool
线程池服务模型,使用标准的阻塞式 IO,预先创建一组线程处理请求。
这里是 Server 的升级版本。
package com.demo.thrift;import com.demo.thrift.service.impl.QueryServiceImpl;import com.demo.thrift.service.QueryService;import org.apache.thrift.TProcessor;import org.apache.thrift.protocol.TBinaryProtocol;import org.apache.thrift.server.TThreadPoolServer;import org.apache.thrift.transport.TServerSocket;import org.apache.thrift.transport.TTransportException;public class ServerThreadPool {public static final int SERVER_PORT = 8888;public void startServer(){try {System.out.println("Thrify Server Start ... ");TServerSocket serverTransport = new TServerSocket(SERVER_PORT);TThreadPoolServer.Args tArgs = new TThreadPoolServer.Args(serverTransport);TProcessor tProcessor = new QueryService.Processor<QueryService.Iface>(new QueryServiceImpl());tArgs.processor(tProcessor);tArgs.protocolFactory(new TBinaryProtocol.Factory());// 线程池服务模型,使用标准的阻塞式IO,预先创建一组线程处理请求。TThreadPoolServer server = new TThreadPoolServer(tArgs);server.serve();} catch (TTransportException e) {e.printStackTrace();}}public static void main(String[] args){ServerThreadPool serviceServer = new ServerThreadPool();serviceServer.startServer();}}
测试-线程池服务模型-ServerThreadPool
运行 ServerThreadPool 的 main 方法

运行 Client 的 main 方法,可以看到,已经运行成功
服务端和客户端-非阻塞式 IO,指定 TFramedTransport 数据传输
使用非阻塞式 IO,服务端和客户端需要指定 TFramedTransport 数据传输的方式。
服务端-ServerTNonblocking
package com.demo.thrift;import com.demo.thrift.service.QueryService;import com.demo.thrift.service.impl.QueryServiceImpl;import org.apache.thrift.TProcessor;import org.apache.thrift.protocol.TBinaryProtocol;import org.apache.thrift.server.TNonblockingServer;import org.apache.thrift.transport.TFramedTransport;import org.apache.thrift.transport.TNonblockingServerSocket;import org.apache.thrift.transport.TTransportException;public class ServerTNonblocking {public static final int SERVER_PORT = 8888;public void startServer(){try {System.out.println("Thrify Server Start ... ");TNonblockingServerSocket tnbSocket = new TNonblockingServerSocket(SERVER_PORT);TNonblockingServer.Args tArgs = new TNonblockingServer.Args(tnbSocket);TProcessor tProcessor = new QueryService.Processor<QueryService.Iface>(new QueryServiceImpl());tArgs.processor(tProcessor);tArgs.protocolFactory(new TBinaryProtocol.Factory());tArgs.transportFactory(new TFramedTransport.Factory());// 线程池服务模型,使用标准的阻塞式IO,预先创建一组线程处理请求。TNonblockingServer server = new TNonblockingServer(tArgs);server.serve();} catch (TTransportException e) {e.printStackTrace();}}public static void main(String[] args){ServerTNonblocking serviceServer = new ServerTNonblocking();serviceServer.startServer();}}
客户端-ClientTNonblocking
package com.demo.thrift;import com.demo.thrift.service.QueryService;import org.apache.thrift.TException;import org.apache.thrift.protocol.TBinaryProtocol;import org.apache.thrift.protocol.TProtocol;import org.apache.thrift.transport.TFramedTransport;import org.apache.thrift.transport.TSocket;import org.apache.thrift.transport.TTransport;import org.apache.thrift.transport.TTransportException;public class ClientTNonblocking {public static final int SERVER_PORT = 8888;public static final String SERVER_IP = "localhost";public static final int TIMEOUT = 30000;public void startClient(String username){TTransport tTransport = null;try {tTransport = new TFramedTransport(new TSocket(SERVER_IP,SERVER_PORT,TIMEOUT));// 协议要和服务端一致TProtocol protocol = new TBinaryProtocol(tTransport);//TProtocol protocol = new TCompactProtocol(tTransport);//TProtocol protocol = new TJSONProtocol(tTransport);QueryService.Client client = new QueryService.Client(protocol);tTransport.open();String result = client.query(username);System.out.println("Thrify Client Result = " + result);} catch (TTransportException ex) {ex.printStackTrace();} catch (TException ex) {ex.printStackTrace();}finally {if(tTransport != null){tTransport.close();}}}public static void main(String[] args){ClientTNonblocking client = new ClientTNonblocking();client.startClient("Luoma");}}
测试-指定 TFramedTransport 数据传输
运行 ServerTNonblocking 的 main 方法

运行 ClientTNonblocking 的 main 方法,可以看到,已经运行成功

IDEA 安装配置 Thrift
参考
IntelliJ IDEA 2018.3
直接在 IDEA 界面中配置
打开 IDEA 的插件中心,搜索 Thrift 即可安装,但是我的 IDEA 搜索不出来
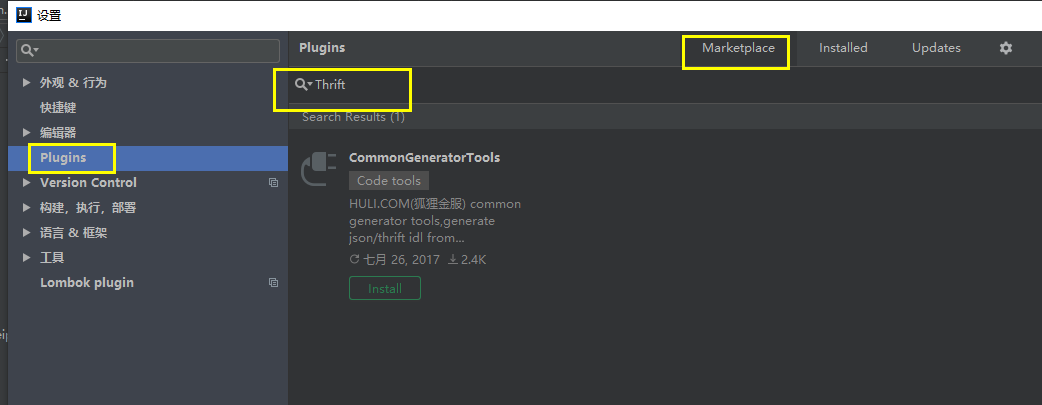
正常情况应该是这样,不知道是不是和我 IDEA 版本有关系
手动下载 Thrift 插件安装
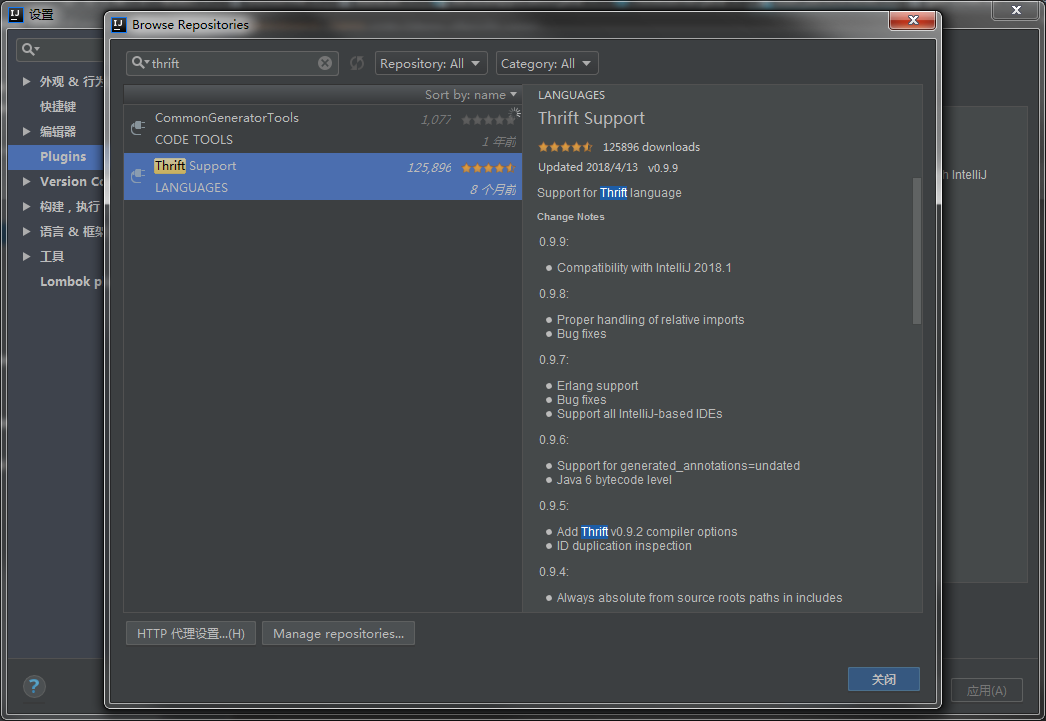
可以去如下地址下载Thrift插件:https://plugins.jetbrains.com/plugin/7331-thrift-support/versions
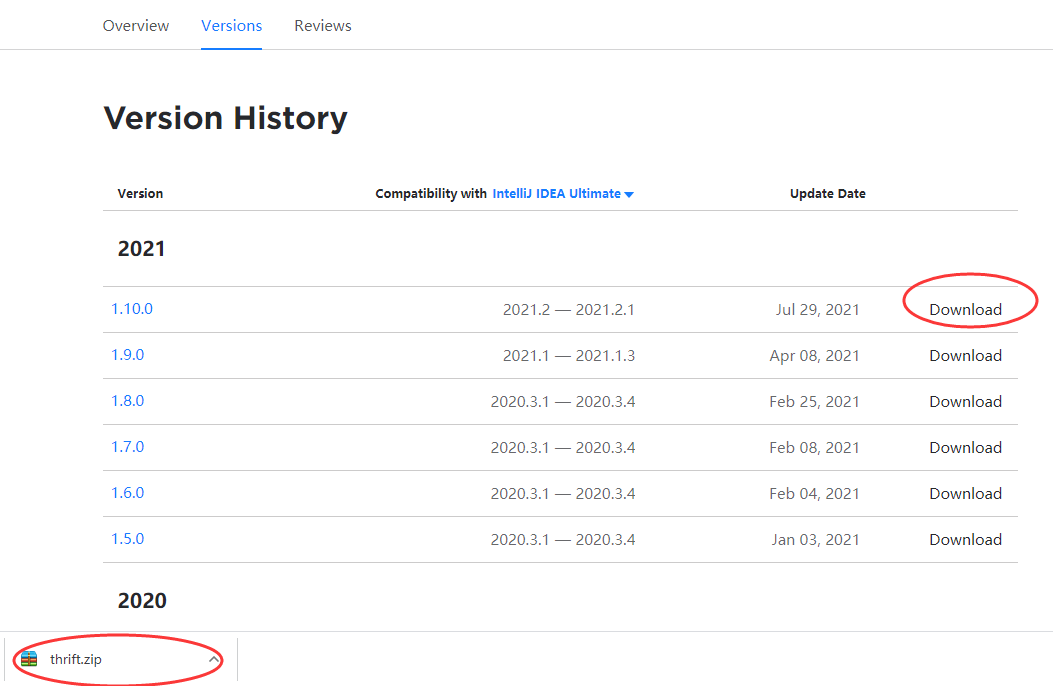
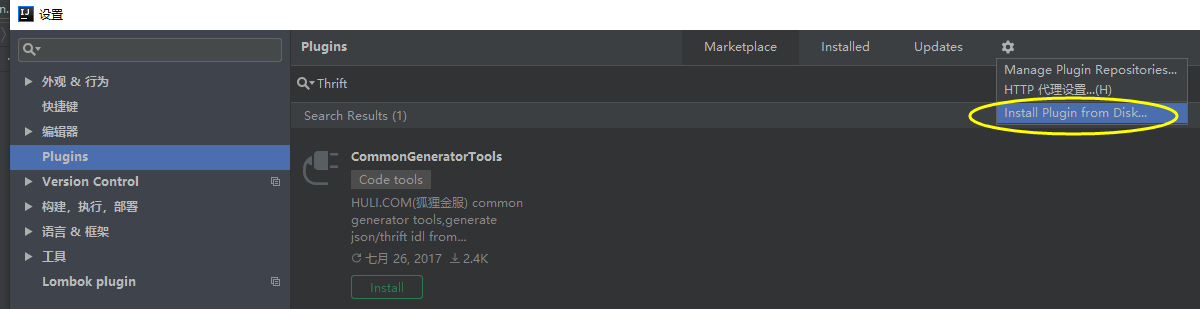
然后去 IDEA中 Install plugin from disk... 选择下载的 zip 包安装
报错,试了另外几个压缩包,都不行,看来是 IntelliJ IDEA 2018.3 这个版本太老旧了。

这里我下载当前最新的 IDEA 版本 IntelliJ IDEA 2021.2.1
IntelliJ IDEA 2021.2.1
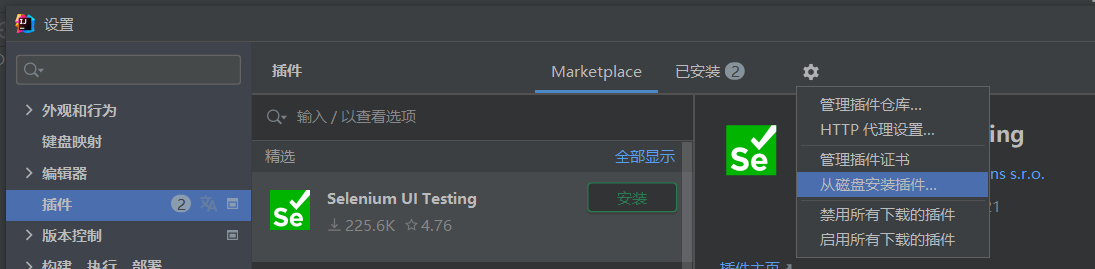
直接在 IDEA 界面中配置
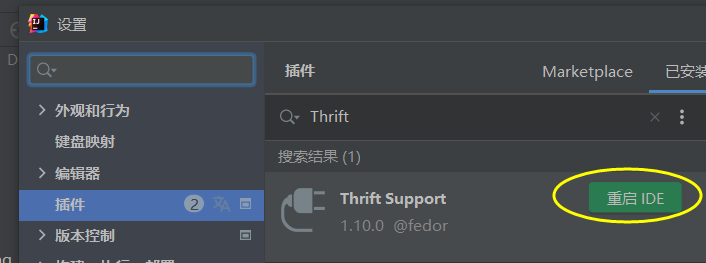
打开 IDEA 的插件中心,搜索 Thrift 即可安装

安装完重启 IDEA 即可
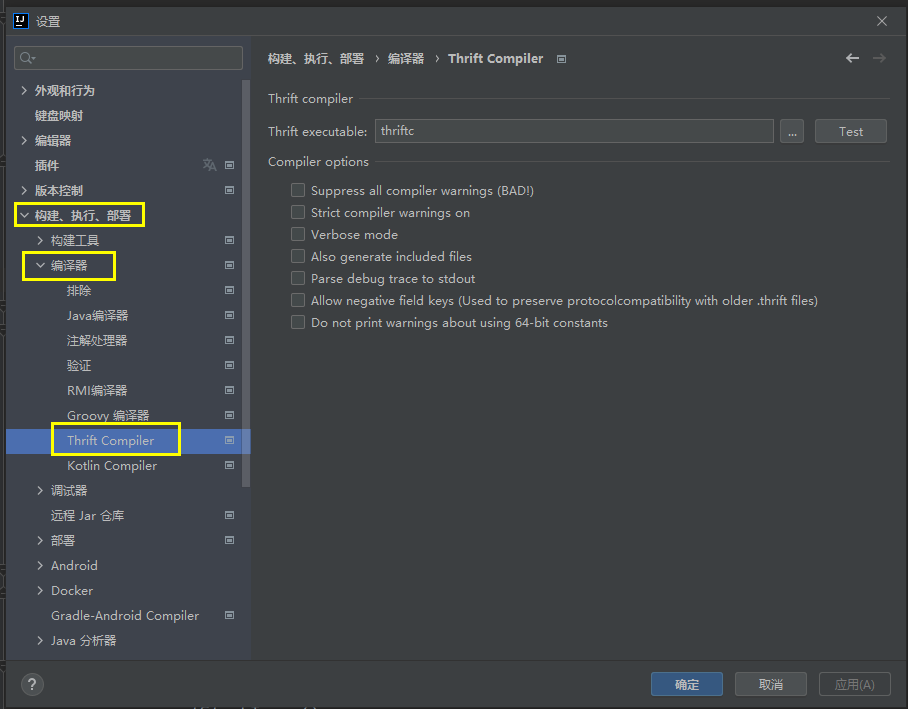
安装完成的成功标志是 Compiler 中出现了 Thrift 编译器
手动下载 Thrift 插件安装
可以去如下地址下载Thrift插件:https://plugins.jetbrains.com/plugin/7331-thrift-support/versions
然后去 IDEA中 Install plugin from disk... 选择下载的 zip 包安装
安装完重启 IDEA 即可
安装完成的成功标志是 Compiler 中出现了 Thrift 编译器
IDEA 使用 Thrift 插件生成 Java 代码
前面的步骤已经下载安装了 Thrift
这里为了方便,我们把 D:\Program Files\Thtift\thrift-0.9.3.exe 修改为 D:\Program Files\Thtift\thrift.exe
控制台测试
C:\WINDOWS\system32>thrift -versionThrift version 0.9.3
项目结构
新建一个项目,项目结构如下
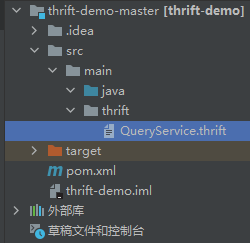
QueryService.thrift
namespace java com.demo.thrift.serviceservice QueryService{string query(1:string query)}
pom.xml
<?xml version="1.0" encoding="UTF-8"?><project xmlns="http://maven.apache.org/POM/4.0.0" xmlns:xsi="http://www.w3.org/2001/XMLSchema-instance"xsi:schemaLocation="http://maven.apache.org/POM/4.0.0 http://maven.apache.org/xsd/maven-4.0.0.xsd"><modelVersion>4.0.0</modelVersion><groupId>com.demo.thrift</groupId><artifactId>thrift-demo</artifactId><version>1.0-SNAPSHOT</version><packaging>war</packaging><name>thrift-demo-master</name><properties><failOnMissingWebXml>false</failOnMissingWebXml></properties><dependencies><dependency><groupId>org.apache.thrift</groupId><artifactId>libthrift</artifactId><version>0.9.2</version></dependency></dependencies><build><finalName>${project.name}</finalName><plugins><plugin><groupId>org.apache.thrift.tools</groupId><artifactId>maven-thrift-plugin</artifactId><version>0.1.11</version><configuration><!-- 如果thrift执行文件的路径已经设置到PATH环境变量,可以直接简写。否则需要给出完整执行路径 --><thriftExecutable>thrift</thriftExecutable><outputDirectory>${project.basedir}/src/main/java</outputDirectory></configuration><executions><execution><id>thrift-sources</id><phase>generate-sources</phase><goals><goal>compile</goal></goals></execution><execution><id>thrift-test-sources</id><phase>generate-test-sources</phase><goals><goal>testCompile</goal></goals></execution></executions></plugin></plugins></build></project>
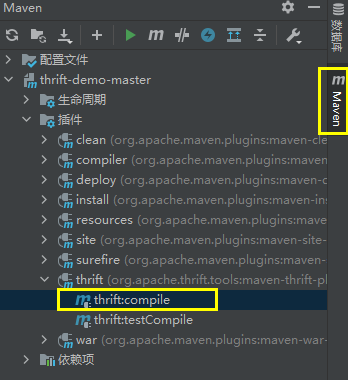
运行编译生成代码
在右侧的 Maven-插件,点击 thrift-thrift:compile
控制台输出
[INFO] Scanning for projects...[INFO][INFO] --------------------< com.demo.thrift:thrift-demo >---------------------[INFO] Building thrift-demo-master 1.0-SNAPSHOT[INFO] --------------------------------[ war ]---------------------------------[INFO][INFO] --- maven-thrift-plugin:0.1.11:compile (default-cli) @ thrift-demo ---[INFO] ------------------------------------------------------------------------[INFO] BUILD SUCCESS[INFO] ------------------------------------------------------------------------[INFO] Total time: 0.993 s[INFO] Finished at: 2021-09-01T15:25:07+08:00[INFO] ------------------------------------------------------------------------进程已结束,退出代码为 0
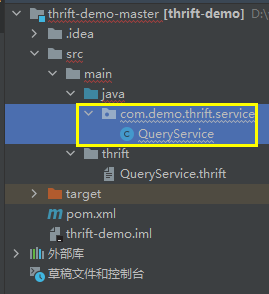
再查看项目结构,已经自动生成了项目文件
错误总结
thrift did not exit cleanly. Review output for more information.
- 执行上一个步骤 运行编译生成代码 报下面的错误
[INFO][INFO] ------< com.luoma.oa.fm.etms.receipt:luoma-receipt-contract >-------[INFO] Building luoma-receipt-contract 1.0-SNAPSHOT[INFO] from pom.xml[INFO] --------------------------------[ jar ]---------------------------------[INFO][INFO] --- thrift:0.1.11:compile (default-cli) @ luoma-receipt-contract ---[ERROR] thrift failed output:[ERROR] thrift failed error: 'thrift' �����ڲ����ⲿ���Ҳ���ǿ����еij������������ļ���thrift did not exit cleanly. Review output for more information.
- 解决方案
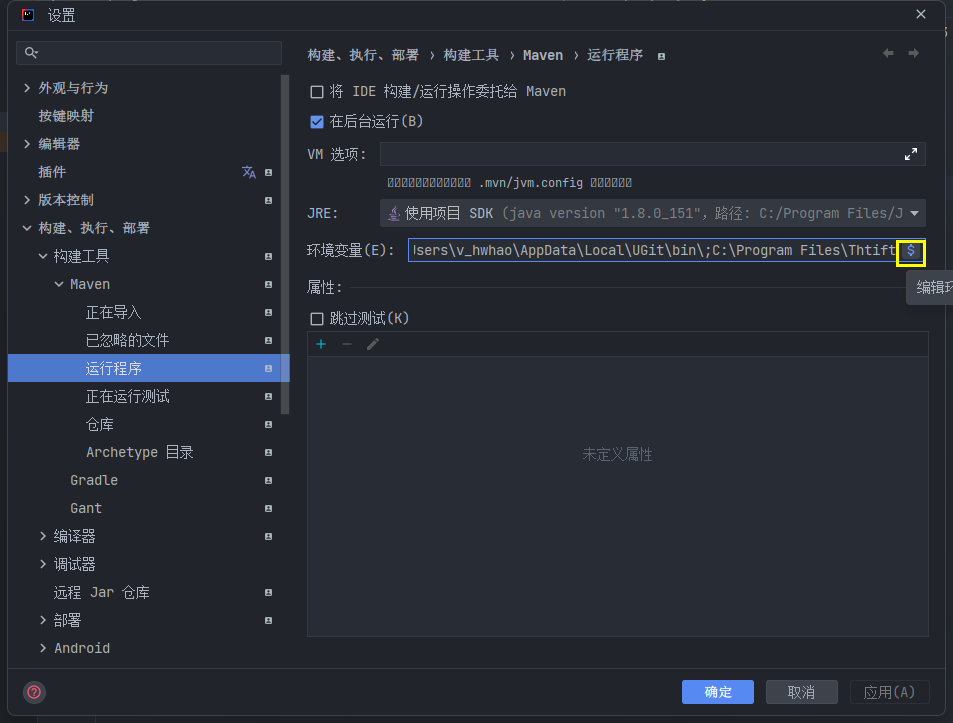
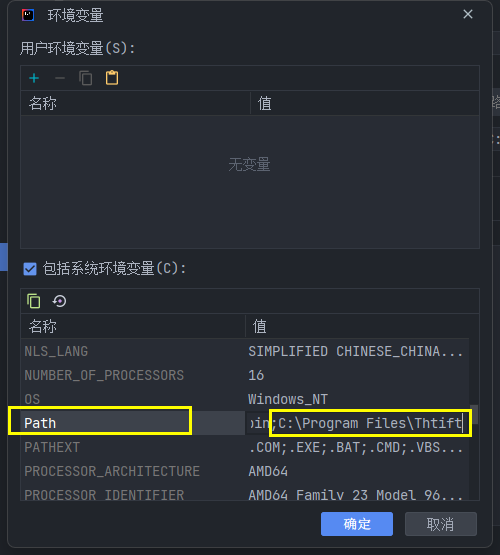
Settings->Build,Execution,Deployment->Build Tools->Maven->Runner环境变量设置,找到
PATH最后添加 Thrift 安装目录
C:\Program Files\Thtift